This is more of set of instructions than a recipe as it is not from scratch:
There are many brands of microwavable macaroni and cheese, available at every corner grocery store or supermarket. A microwave is not, however, needed to cook these mac'n'cheese products.
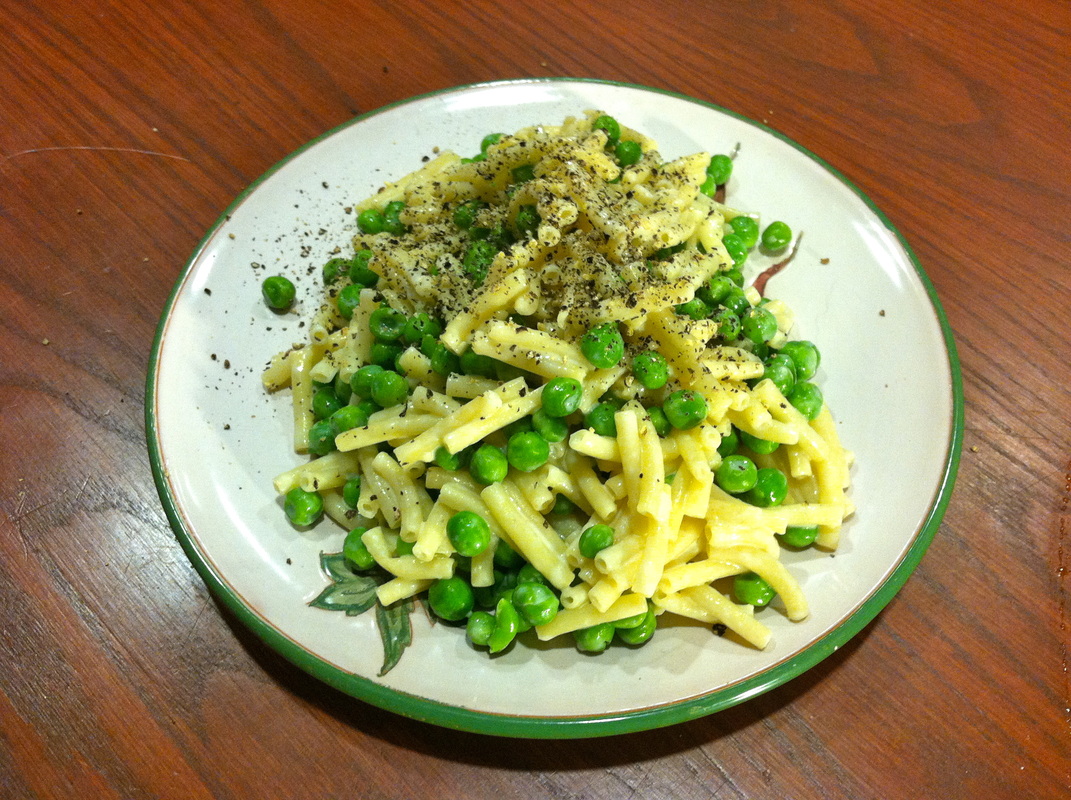
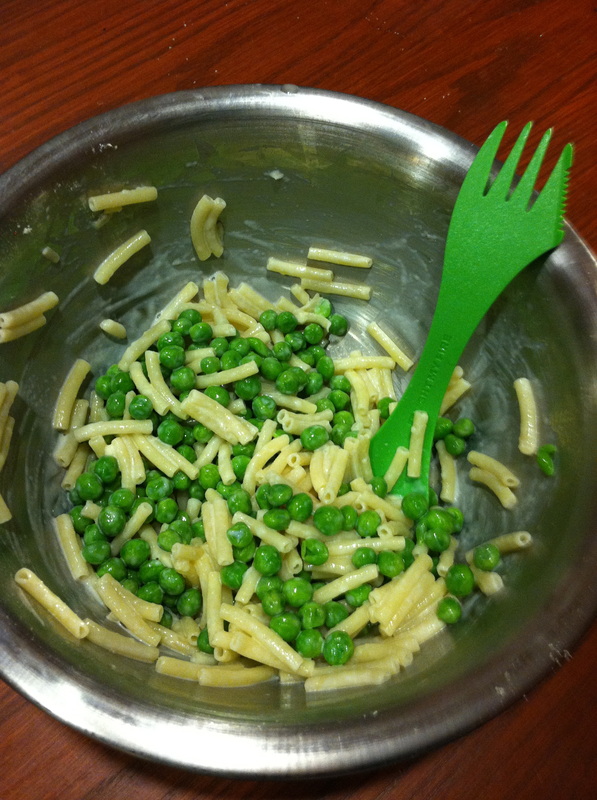
Today we will show you how to cook mac'n'cheese (the kind that comes with the dry, separated, noodles and cheese) using the hot water from your electric kettle. We will also class it up with the addition of peas, cooked with (you guessed it) boiling water from your kettle. Add some freshly ground pepper and you have a fantastic dinner from your dorm room!
Today we will show you how to cook mac'n'cheese (the kind that comes with the dry, separated, noodles and cheese) using the hot water from your electric kettle. We will also class it up with the addition of peas, cooked with (you guessed it) boiling water from your kettle. Add some freshly ground pepper and you have a fantastic dinner from your dorm room!
Ingredients:
- One pack of macaroni and cheese (we used Annie's White Cheddar)
- 2/3 cup frozen peas
- Butter (optional) (f)
- Small thermos
- Colander (optional)
Instructions:
- Put the peas in the thermos and cover with boiling water (try to fill the thermos as close to an inch from the top)
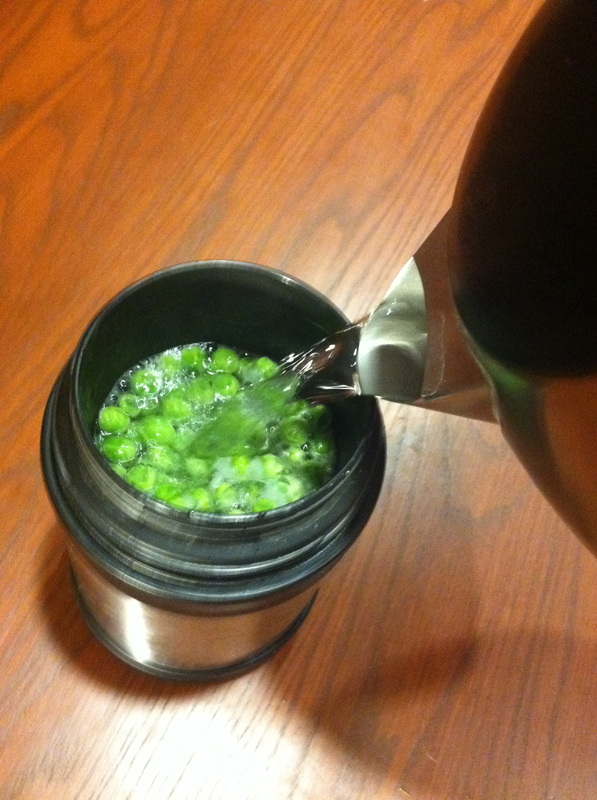
2. Cover with lid and let sit for 4 minutes.
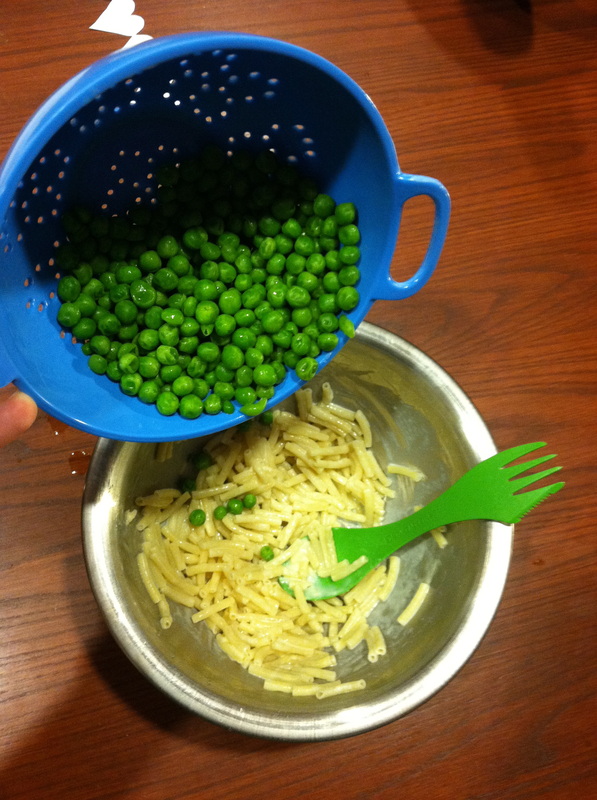
3. Pour the peas into the colander (or just tip the thermos, draining the water while avoiding spilling the peas) and let sit. Add pat of butter if you want.
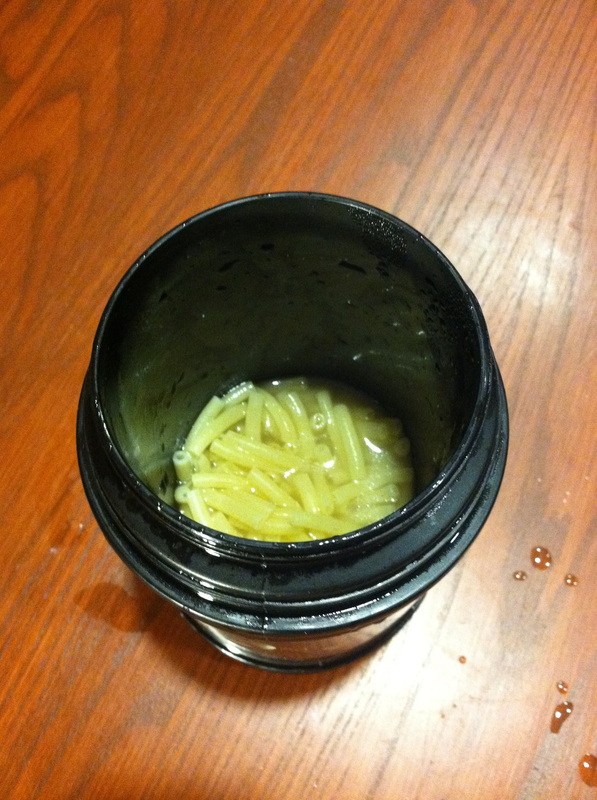
4. Add plain noodles, from the package, to thermos. Pour boiling water over the noodles untill it reaches a level at least 2 inches above macaroni. Cover with lid.
5. Stir with a spoon after 1 min to prevent noodles from sticking together and replace the lid. Swirl thermos occasionally for remaining 3 mins. (boiling water can spurt out of the closed thermos when it is sloshed around so be careful)
3. Pour the peas into the colander (or just tip the thermos, draining the water while avoiding spilling the peas) and let sit. Add pat of butter if you want.
4. Add plain noodles, from the package, to thermos. Pour boiling water over the noodles untill it reaches a level at least 2 inches above macaroni. Cover with lid.
5. Stir with a spoon after 1 min to prevent noodles from sticking together and replace the lid. Swirl thermos occasionally for remaining 3 mins. (boiling water can spurt out of the closed thermos when it is sloshed around so be careful)

6. Pour out as much water as possible from top of noodles (it is OK if some water remains) and leave noodles in thermos.
7. Add the dried cheese and stir into noodles. More warm water from the kettle may be added to reach desired consistency.
8. Stir peas into mac'n'cheese.
Add fresh pepper and munch away!


 RSS Feed